Business Cards Imposition
This feature will be very useful to settle up the composition of a medium / large number of business cards and similar.
All you have to do is just follow some simple rules and the tedious task of business card composition will be done in a minute and, most of all, will be error free.
Premises
Imposition front back is realized using coupled pages, the odd one for fronts, the even one for backs. See fig. 1.
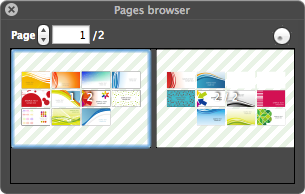
Fig. 1 - The page browser
(at left the front, at right the back)
The cards will be disposed in a grid centered on the page and the printing front / back will be obtained turning the sheet along the vertical axis.
The algorithm will take care of turning, orienting and moving the cards in order to couple each front with the corrensponding back (if any).
To get this correctly it is necessary to follow some simple prerequisites:
Prerequisites
To get this feature to work correctly you must adhere to the following:
- Cards must be all the same size.
- Portrait or landscape orientation is not important, but it is mandatory that, with no rotation (0°), the texts in the card will be in the correct reading orientation.
- Cards must follow the naming conventions suggested here below:
Styles and conventions
FitPlot identifies two main kinds of card imposition:
Business cards
These are the printings where each front (may or not) have a corrensponding back.
These may be also postcards, leaflets, bookmarks and so on.
Of course they share the same paper and they should have the same size (regardless of the orientation).
The program recognize and processes these kind of files:- PDFs composed of 2 pages where the first one is conventionally the front and the second one is the back.
- Images that have free names but with the same name with a common suffix to identify the corrensponding back.
Playing cards
These are the printings where you may have many different fronts sharing the same common back, as a playing cards deck. In these case are valid these two conventions:- PDF multipage for the fronts, PDF with one page for the common back.
- Images have free names, the name for the back is up to you.
Let's do it
This tool operates on a selection of images / PDF. These images should follow the requirements before said.
One more thing, before to enter this tool, set up your page format. You can't change the page format from inside the dialog (unless you cancel and re-enter it).
With PDF or images selected, choose menu File -> Imposition -> Business Cards… (or the relative tool ![]() in the toolbar).
in the toolbar).
If the menu is grayed, then you have not selected at least two items.
After selecting the imposition business cards command, a dialog should appear, according with the last time it was used, in one of two configurations visible in fig. 2A and 2B.
Dialog / options
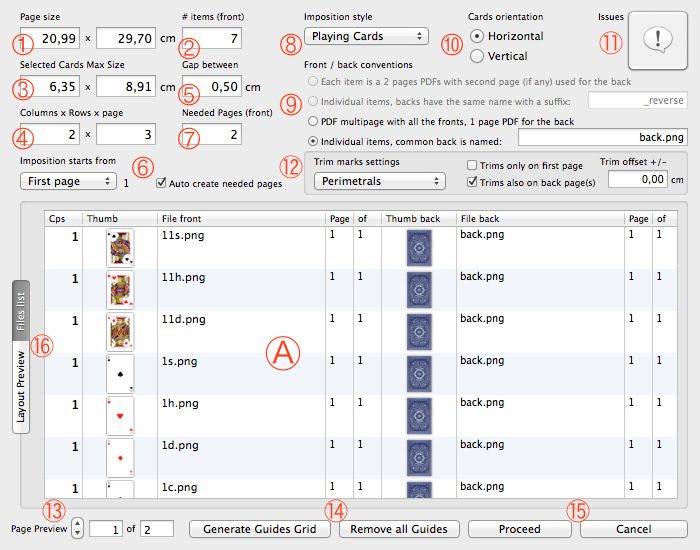
Fig. 2 A - Business Card Imposition Dialogs: Files List Tab
- Page Size: This is the current page format. If you want to change it before the imposition, press the Cancel button, change the page setup, then enter the dialog again.
- #items (front): It shows the number of items (cards) determined by the selection passed and by the number of copies for each card.
- Selected Cards Max Size: As said before, all cards should be the same size, however the algorithm processes all the passed images and unifies the size of all cards to the larger one. In this case the spaces between different cards can vary.
- Columns x Row: Here you define the grid layout.
- Gap: This is the separation value between each card and the next in the next / previous column / row.
- Starting page and auto creation: Usually you start imposing from the first page, but if you have already done another imposition before, you can add a page (see pagination here to know how) and append the new imposition from there.
Also, usually you want to create needed pages automatically, but you may not want, in this last case, uncheck the box. - Needed Pages (front): The resulting number of pages (front) given by the number of items involved and the grid values.
- Imposition style: see Styles and conventions.
- Front / back conventions: also this has been explained before in Styles and conventions paragraph.
- Card orientation: Horizontal or Vertical are the two options. In the horizontal option, all cards will present the longest side as the base, vertical option will constrain all cards to have the shortest side ase the base. Each card, if needed, will be rotated 90° ccw and the corrensponding back side will be rotated 90°cw to get the right coupling.
- Issues alert / messages: this is a button with an icon. The icon may assume yellow or red color to alert that some parameter / setting is not correct. Pushing the button will show some explaination on what's goin wrong together with fix suggestions.
- Trim marks settings: Here you can set the signs to print for easy cropping. Here you find also the offset for trim sign. Negative values means toward the inner, positive means toward the outer of the card.
- Page preview: Controls to preview the pages (when in layout preview mode).
- Generate / remove guides: When you choose a grid setting, it may be useful to generate the magnetic guides for that grid. In this way it is easy to add and position manually any other card needed.
- Proceed / Cancel: Cancelling takes back to the situation before entering the dialog. Proceeding performs the automatic layout, generating, in case, the needed pages. If you want to restart from the beginning, simply undo.
- Files list / Layout Preview: The central area of the dialog shows either the involved files list or the real time preview.
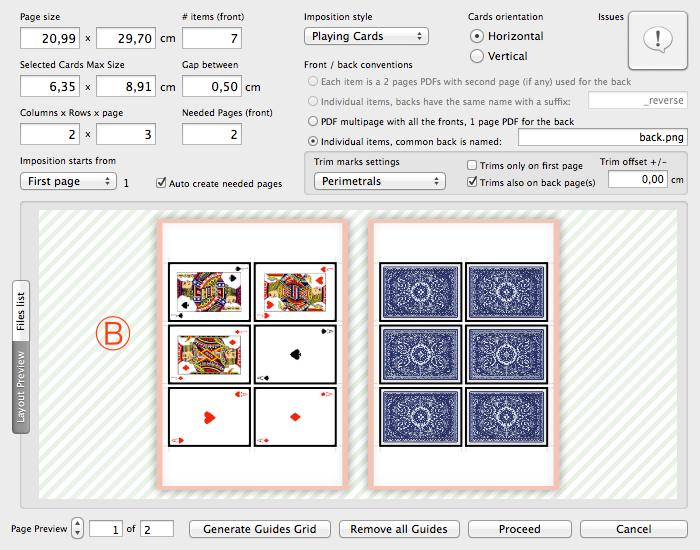
Fig. 2 B - Business Card Imposition Dialogs: Layout Preview Tab
- A: When in files list you can set the number of copies for each card, just double clicking the Cps columnn at a selected row and typing a number.
- B: In the preview tab you'll see the real effect of changing the above described parameters (grid, orientation, gap etc.).
There is a practical video demonstration about this from the FitPlot YouTube channel here below:
This and other video lessons are available on FitPlot YouTube Channel